Writing a Rust Driver for the MPU6050
A first attempt at writing a hardware driver for the MPU6050 using the Rust Programming Language
1. Introduction
I’ve recently been tinkering with Rust on embedded systems and have been pleasantly surprised by how thoughtfully designed it is compared to the C and C++ ecosystems. One of the things I immediately appreciated was how easy and straightforward builds are with Rust—just running cargo build makes life simpler. Debugging and printing are also more intuitive, thanks to tools like defmt, which feels like a breath of fresh air compared to traditional methods.
In contrast, setting up a project with C or C++ is often cumbersome. You typically find yourself locked into vendor-specific IDEs if you want quick setups. And if you prefer a more lightweight editor like Sublime or Neovim, you usually end up wrestling with creating and maintaining complex CMake files yourself.
With these advantages in mind, I’ve recently been working on building out an embedded controller for running some IMU sensors and motors for a personal project and decided it was the perfect opportunity to use Rust.
For the IMU, I’ll be using the MPU-6050 is a widely-used accelerometer and gyroscope IMU sensor that’s great for robotics, drones, and embedded projects. While there are some existing Rust drivers for this IMU sensor, I thought this was a good opportunity for me to go through the process of writing an I2C driver in Rust and compare it with the process of doing the same thing in C/C++. In this article, we’ll explore building a minimal MPU-6050 driver in Rust, specifically using the Embassy async framework on an STM32F103C8 (BluePill) microcontroller.
2. High-Level Architecture and Approach
As this is my first attempt at a driver, I decided to use the MPU6050 driver by SparkFun as a reference, and borrowed heavily from their approach. I also decided to write a blocking driver first.
Our driver separates into three parts:
- Register Definitions: Constants representing MPU-6050 registers.
- Bit-field Traits: Providing safe and ergonomic register manipulation.
- I²C Transport: Basic read/write methods using Embassy’s blocking I²C.
3. Communicating with MPU-6050
The MPU-6050 communicates over I²C, typically at address 0x68 or 0x69 depending on the AD0 pin:
AD0 Low (GND): Address0x68(default)AD0 High (VCC): Address0x69
However, I wanted the option to be able to use a completely custom I2C address if needed. So the final design of the driver struct was:
pub struct MPU6050I2c<'d> {
    peripheral: I2c<'d, embassy_stm32::mode::Blocking>,
    address: u8,
}
4. Representing Registers in Rust
4.1 Register Constants
All registers are defined as constants, avoiding heavy enum overhead:
pub const MPU6050_RA_ACCEL_XOUT_H: u8 = 0x3B;
// More registers...
4.2 Bit-field Traits
Using Rust traits, we create a safe way to handle register bits:
pub trait MPU6050BitField {
    fn addr() -> u8;
    fn location() -> u8;
    fn length() -> u8 { 1 }
    fn mask() -> u8 { (1 << Self::length()) - 1 }
    fn from(value: u8) -> Self;
    fn to_value(&self) -> u8;
}
Implementing traits for specific fields:
pub enum SleepMode {
    Sleep = 0x01,
    WakeUp = 0x00,
}

impl MPU6050BitField for SleepMode {
    fn addr() -> u8 { MPU6050_RA_PWR_MGMT_1 }
    fn location() -> u8 { MPU6050_PWR1_SLEEP_BIT }
    // more methods...
}
5. Core I²C Driver
Our I²C driver class MPU6050I2c encapsulates Embassy’s blocking I²C:
Constructor
In our constructor we accept an embassy_stm32::i2c::Instance from which we can construct an I2C peripheral we can interact with. We also accept generic pin types for the SDA and SCL pins and a user defined I2C frequency. This lets the end user decide on which peripheral and pins to use in their application.
impl<'d> MPU6050I2c<'d> {
    pub fn new<P: Instance>(
        peri: P,
        scl_pin: impl SclPin<P>,
        sda_pin: impl SdaPin<P>,
        freq: Hertz,
    ) -> Self {
        MPU6050I2c {
            peripheral: I2c::new_blocking(peri, scl_pin, sda_pin, freq, Config::default()),
            address: MPU6050_DEFAULT_ADDRESS,
        }
    }

    pub fn new_with_address<P: Instance>(
        peri: P,
        scl_pin: impl SclPin<P>,
        sda_pin: impl SdaPin<P>,
        address: u8,
        freq: Hertz,
    ) -> Self {
        MPU6050I2c {
            peripheral: I2c::new_blocking(peri, scl_pin, sda_pin, freq, Config::default()),
            address,
        }
    }
}
Basic Read/Write Operations
We have read_byte() and write_byte() functions to handle low-level communication.
/// Read a byte from the specified register of the MPU6050.
pub fn read_byte(&mut self, reg: u8) -> Result<u8, embassy_stm32::i2c::Error> {
	let mut buf = [0; 1];
	self.peripheral
		.blocking_write_read(self.address, &[reg], &mut buf)?;
	Ok(buf[0])
}

/// Write a byte to the specified register of the MPU6050.
pub fn write_byte(&mut self, reg: u8, value: u8) -> Result<(), embassy_stm32::i2c::Error> {
	self.peripheral.blocking_write(self.address, &[reg, value])
}
Generic Field Access
Reading and writing specific configuration fields within bytes is simplified using generics. As long as you have your configuration field appropriately implemented.
pub fn read_field<T: MPU6050BitField>(&mut self) -> Result<T, embassy_stm32::i2c::Error> {
	// 1. Read the present 8-bit value in that register
	let value = self.read_byte(T::addr())?;

	// 2. Shift the bits to the right so that the field is in the least significant bits
	let shifted_value = value >> (T::location() - T::length() + 1);

	// 3. Mask the bits to get only the bits that belong to the field
	let masked_value = shifted_value & T::mask();

	// 4. Return the masked value
	Ok(T::from(masked_value))
}

pub fn write_field<T: MPU6050BitField>(
	&mut self,
	field: T,
) -> Result<(), embassy_stm32::i2c::Error> {
	// 1. Read the present 8-bit value in that register
	let mut current_value = self.read_byte(T::addr())?;

	// 2. Clear (zero) the bits that belong to the field
	current_value &= !(T::mask() << T::location());

	// 3. Insert the bits you want, lined up at the correct position
	current_value |= (field.to_value() & T::mask()) << T::location();

	// 4. Write the new byte back to the device
	self.write_byte(T::addr(), current_value)
}
We can then write and read fields like so:
let mut imu_sensor = MPU6050I2c::new(p.I2C2, p.PB10, p.PB11);
imu_sensor.write_field(MPUClkSource::PLLWithXGyro)?;
imu_sensor.read_field::<GyroFullScaleRange>()?;
6. High-Level Sensor Reads
We simplify reading sensor data by writing functions to read single axis sensor data as well as bulk sensor reads.
- Single-axis:
read_accel_x(),read_gyro_y(), etc. - Bulk reads:
read_accel(),read_gyro(),read_all()
An example of the read_gyro() function:
pub fn read_gyro(&mut self) -> Result<(i16, i16, i16), embassy_stm32::i2c::Error> {
	let mut data = [
		MPU6050_RA_GYRO_XOUT_H,
		MPU6050_RA_GYRO_XOUT_L,
		MPU6050_RA_GYRO_YOUT_H,
		MPU6050_RA_GYRO_YOUT_L,
		MPU6050_RA_GYRO_ZOUT_H,
		MPU6050_RA_GYRO_ZOUT_L,
	];
	self.peripheral
		.blocking_write_read(self.address, &[MPU6050_RA_GYRO_XOUT_H], &mut data)?;

	let gyro_x = ((data[0] as i16) << 8) | (data[1] as i16);
	let gyro_y = ((data[2] as i16) << 8) | (data[3] as i16);
	let gyro_z = ((data[4] as i16) << 8) | (data[5] as i16);
	Ok((gyro_x, gyro_y, gyro_z))
}
7. Example Application
A complete example reading data at 50 Hz:
Initialization
let mut imu_sensor = MPU6050I2c::new(p.I2C2, p.PB10, p.PB11);
imu_sensor.write_field(MPUClkSource::PLLWithXGyro)?;
imu_sensor.write_field(TempDisable::Disable)?;
imu_sensor.write_field(GyroFullScaleRange::FS500)?;
imu_sensor.write_field(AccelFullScaleRange::FS2)?;
imu_sensor.write_field(SleepMode::WakeUp)?;
Main loop
let mut ticker = Ticker::every(Duration::from_hz(50));

loop {
    match imu_sensor.read_accel_gyro() {
		Ok((ax, ay, az, gx, gy, gz)) => {
			info!("{} {} {} {} {} {}", ax, ay, az, gx, gy, gz);
		}
		Err(e) => {
			error!("Error reading IMU data: {:?}", e);
		}
	}
    led.toggle();
    ticker.next().await;
}
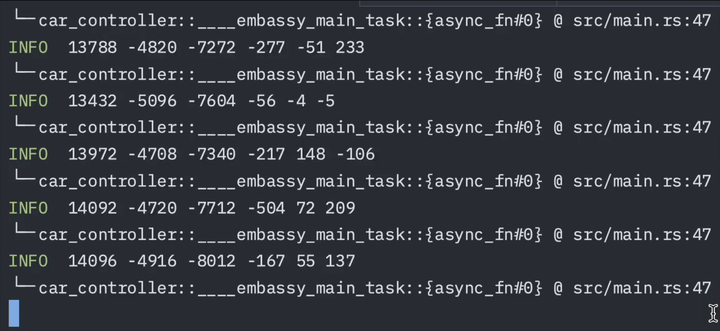
8. Building & Flashing
Using
probe-rs makes flashing and debugging ridiculously simple, once your .cargo/config.toml is set up right. You can configure a runner for your target chip like so:
[target.thumbv7m-none-eabi] # <-change for your platform
runner = 'probe-rs run --chip STM32F103C8' # <- change for your chip
# rustflags = ["-C", "link-arg=-Tlink.x"]

[build]
target = "thumbv7m-none-eabi" # <-change for your platform

[env]
DEFMT_LOG = "trace" # <- can change to info, warn, or error
And then run
cargo run --release
To have probe-rs flash the firmware on to the micro-controller and view the info!() statements print output.
9. Conclusion and Next Steps
While this is a good first pass at the driver and things are working, there’s plenty of room to improve and generalize the driver further. Immediate next steps include:
- Enhanced Documentation: Expanding the coverage of documented MPU-6050 register fields.
- Robust Error Handling: Removing existing panic!() statements and implementing more precise and informative error handling.
- Generalization with Embedded-HAL: Adapting the driver to use Rust’s standardized
embedded-haltraits will enhance its portability across various microcontrollers and frameworks, making the driver more widely usable in the embedded Rust ecosystem.
Ashwin Narayan
Robotics | Code | Photography
I am a Research Fellow at the National University of Singapore working with the Biorobotics research group